You've got the itch to tile your bathroom yourself. Hey, you watch HGTV how hard can it be, right? Slow your roll there, Chip and Joanna. Tiling seems simple, but some common pitfalls can turn your Pinterest-worthy dreams into a nightmarish mosaic of uneven grout lines and cracked tiles. Lucky for you, we've got the inside scoop on how to avoid the most common mistakes rookie tilers make. With our tips, you'll be channeling your inner Mike Holmes and tiling like a pro in no time. Grab your float and your safety goggles, and let's get ready to rock this DIY bathroom reno.
Preparing for Tile Installation
Before you dive into tiling your space, there are a few preparations you'll want to make. First, ensure you have the proper tools and materials. You'll need tiles (of course!), tile adhesive or mortar, grout, spacers, a trowel, a bucket, a sponge, and safety gear like gloves, kneepads and protective eyewear.
Clean and Level the Surface
Clean the area thoroughly to remove any dirt or debris. Check that the surface is level—if not, you may need to apply a concrete leveler compound. For walls, apply a cementitious backer board to provide a solid, water-resistant base.
Plan Your Layout
Do a dry run by laying out tiles on the floor without mortar to determine the best pattern and get an idea of how the cuts will work. Use spacers between tiles to ensure even gaps. Snap photos so you have a reference as you go. For walls, use a level and tape to mark vertical and horizontal lines as guides.
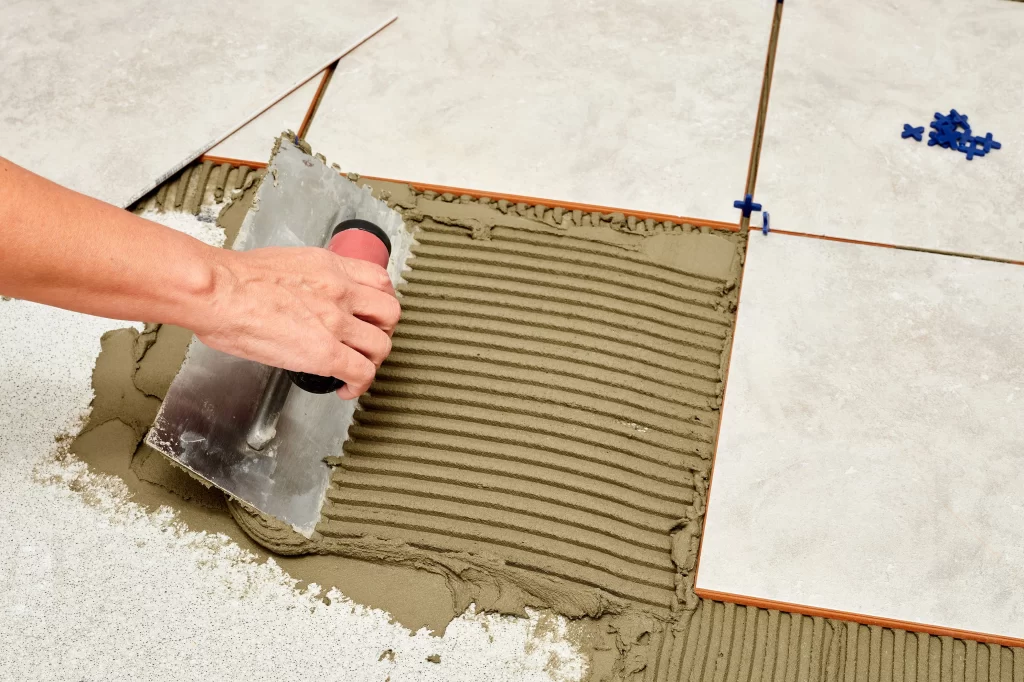
Mix the Mortar
Following the product directions, mix either tile adhesive or thin-set mortar. The mortar should be spreadable but not runny. Add water sparingly, mixing as you go. Don't make too much mortar at once or it can dry out before you use it.
Get in the Zone
Install tiles in sections so you can stand on the finished area without disturbing the mortar. Do edges first, then fill in the middle. Place tiles with spacers, using a rubber mallet to gently tap them into the mortar and a trowel to spread more mortar as needed.
Wipe excess mortar from the tile face and gaps with a damp sponge as you work. Once done, let the mortar cure as directed before walking on or grouting your new tile surface. Take your time—good preparation and patience will pay off in a tile job well done!
Step-by-Step DIY Tile Installation Guide
Gather Your Supplies
Before you start slapping mortar on the wall, make sure you have everything: tiles, mortar, grout, spacers, trowel, sponge, buckets, knee pads, etc. There's nothing worse than realizing you're missing something halfway through the job.
Prepare the Surface
The surface needs to be clean, smooth, and sturdy. Patch any holes or cracks, then apply a sealant or primer if needed. For walls, install cement board or drywall. For floors, add plywood over the subfloor.
Plan Your Layout
Do a dry run by laying out your tiles on the floor without mortar to determine the best pattern and get an idea of how it will look. Use spacers for even grout lines. Snap chalk lines as guides.
Mix the Mortar
Follow the instructions on the product packaging to mix the mortar to the proper consistency. Add a little at a time, mixing thoroughly after each addition. The mortar should be thick enough to hold ridges from the trowel.
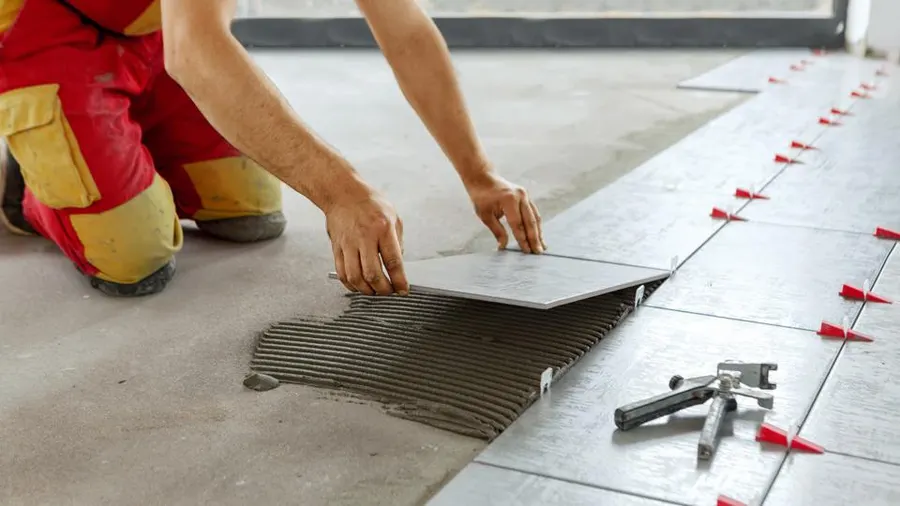
Apply the Mortar
Spread mortar over a small section of the surface using the trowel. Apply only as much as you can tile before it starts to harden, usually 3 to 5 square feet at a time.
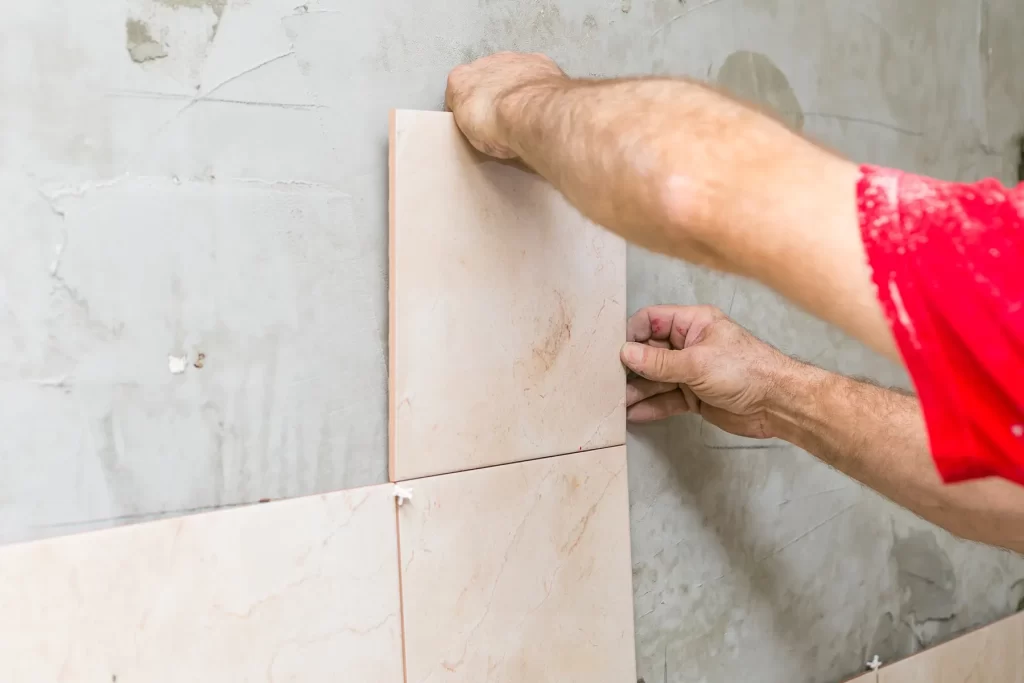
Place the Tiles
Place each tile onto the mortar, using the spacers to keep them evenly spaced. Push down firmly and twist slightly to adhere it to the mortar. Periodically check that tiles are level as you go using a level.
Finish Up
Once the mortar has dried completely, you're ready to grout. Spread the grout over the tiles with a grout float, wipe away excess with a damp sponge, and buff once dry. Your new tile surface is ready to enjoy! With some patience and the proper technique, your DIY tile job can look as good as a pro's.
Avoiding Common Mistakes When Installing Tile
Installing tile yourself can be very rewarding. However, it also comes with risks if you’re not careful. Here are some of the most common mistakes DIYers make so you can avoid them.
Not Planning Ahead
It’s easy to get excited and dive right into your project, but failing to plan properly can lead to big headaches down the road. Make sure you measure the area, calculate the amount of tile and supplies needed, and map out your tile pattern before purchasing anything. Buying too little tile means another trip to the store, while too much tile is wasted money.
Uneven Subfloor
An uneven subfloor will lead to uneven tile that looks sloppy and is prone to cracking. Check that your subfloor is smooth, structurally sound, and level. Patch any holes or dips and sand down high spots. For large leveling jobs, you may need to apply a layer of thinset mortar. This step is critical, so take the time to do it right.
Not Allowing Enough Time
Tiling projects always take longer than expected, especially if you’re an amateur. Make sure you allocate plenty of time so you don’t feel rushed. Work slowly and carefully, double check your measurements, and take breaks when needed to avoid fatigue. If possible, avoid scheduling the tile installation around the same time as other home renovation projects. Focusing on one task at a time will lead to higher quality results.
Improper Spacing
Leave equal spacings between tiles for the most professional looking finish. Use tile spacers to help guide you, and double check spacings with a tape measure as you go. Uneven or irregular spacings are an easy mistake to make and will be glaringly obvious once the project is done.
With some patience and proper planning, you can achieve gorgeous results installing tile yourself. Avoid these common pitfalls, take your time, and enjoy seeing your vision come to life! The satisfaction of a job well done will make all the effort worthwhile.
Conclusion
So there you have it - with some careful planning, patience, and the right tools, installing tile can be a very doable DIY project. Just remember to take your time, use proper thinset coverage, watch those grout lines, and don't rush through sealing. Tile projects take some work but the results are so worth it. That gorgeous new backsplash or floor will add style, value and durability to your home. With a few pro tips in your pocket, you can avoid the headaches and handle this tile job like a champ. Now go grab those tiles and start creating something beautiful! You got this.
 Live Photos & Videos